 The definition of all-in-one printers is a bit murky these days. It used to mean that the printer had a scanner and fax capabilities built in. This is much less common as digital document transmissions are generally just handled via email rather than fax. Of course, people are also printing less these days as they just transfer digital files to one another more often. This is likely why those that do buy printers want an all-in-one. This way they can digitize their old photos and documents and still have the ability to print a photo or document when they need to. Canon is a big name in imaging and they are one of the larger companies when it comes to photo printers. Today, I take a look at the Canon PIXMA MG7120 all-in-one photo printer to see how it holds up for those that still need print and scanning features.
The Design
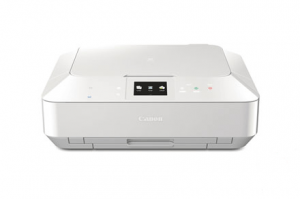
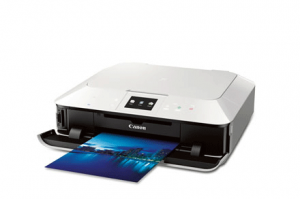
 Overall, the PIXMA MG7120 is a nice clean looking printer with its glossy white plastic. If you don’t happen to not like white, it is also available in black, brown and red. The printer is designed to keep all trays internal so they are not exposed. The scanner lid is flush with the top and in the middle of the front angled bezel is the small color touchscreen. Of course these lines get disrupted once the output tray pops open to allow the paper to come out. It is also necessary to open this tray to reach the memory card reader on the left hand side.
Several warnings with regards to this output door. Be careful that this door is not blocked as the printer will still attempt to print which can cause the paper to get jammed or mess up the print quality. Second, when you go to close the door, be sure that the extender folds back down and in again.
The touchscreen is important for the multi-function capabilities. This is how to access the printer for copying, printing from camera memory cards and doing some more advance image adjustments prior to scanning. This also allows some access to cloud based features which sound useful but frankly you are better off connecting via a computer for the cloud and then printing from it. Of course setup and adjustments to the printer can also be done from this screen.
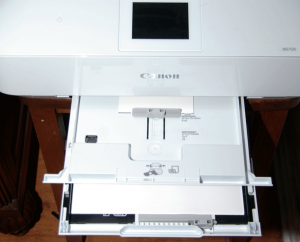
 There are actually two paper trays the reside in the front below the output door. The upper one is a special tray for things like photo paper while the lower tray is for your standard paper. Included on the bottom of one tray is the insert for printing labels to blank optical discs. While the two tray system is useful for not having to swap between photo paper and regular paper it has several drawbacks. First, the trays are very small and don’t hold a lot of paper. Second, some applications are not good about selecting which tray to print from such that you have to remove one tray or the other when you actually do print. Finally, the location makes them hard to remove and insert into the printer.
Setup
The instructions for setup are quite straight forward but the process will take a fair amount of time. The reason is that much of the setup is done through the touchscreen on the printer. In addition, the printer will require calibration using the special page that is included with the printer. You only get two sheets of the special paper so be sure that you do that step correctly in particular.
If you are setting up the printer to be on a wireless network, you will probably need to input all of the information regarding the wireless network manually through the touchscreen. In my case, it was able to scan the wireless network but as it is a secured network, I had to manually configure the security method and passphrase to get it connected.
Once the printer is setup, it is necessary to setup the printer drivers with the computers that will be using it. The printer also has the ability to be used via AirPrint with Apple iOS devices connected to the same wireless network. One word of warning, I was only able to print to the photo paper when I attempted to use the AirPrint capabilities. It can also be used as a stand alone copier or scanner to digital memory cards.
Printer Output and Speed
Printing speed are something that is highly dependent upon what you are printing. Printing straight black text from a word processor is going to be fast enough for most people regardless of what type of printer they use these days. What really matters is when you are doing complex color printing with photographic images. Canon gives an estimate of roughly 21 seconds for a 4×6 print and around 6 seconds for a color print but that is an estimate for a non-photo printout. If you factor out all of the warm up and paper pulling into the printer, then Canon’s estimates are very close as the 4×6 took 22.5 seconds while the standard 8×10 on plain paper took around 20 seconds.
In terms of output quality, when you use photo paper for images, the results are as good as traditional photo printing services. The downside here is that the cost per print is of course going to be much greater than the $.10 or less per 4×6 you can get at many retailers. Color printing on standard paper stock is of course not going to be as nice as heavy photo printer but it will do in a pinch and does a fine job with standard graphs, web pages and such. The addition of the grey color cartridge actually did help a lot with the printer output when dealing with photographs as there was less of a color tint to greys in the output compared to standard four color (cyan, yellow, magenta, black) printers.
Supplies
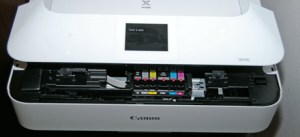
As with all inkjet class printers, the cost of ink is going to be a major concern. With a total of 6 ink cartridges in the PIXMA MG7120, replacing the ink is going to be a costly endeavor. Here are the options available:
| Cartridge Type | List Price | Amazon Price |
| CLI-251XL Single Color (Black, Cyan, Grey, Magenta, Yellow) |
$17.99 | $15-$17 |
| CLI-251 4-Pack (Black, Cyan, Magenta, Yellow) |
$44.99 | $40 |
| PGI-250XL (Black) | $22.99 | $19 |
 So, replacing all of the cartridges individually would total up to $112.94 at list prices (that’s for all XL or high yield cartridges). If you happen to get the 4-pack of color, one grey cartridge and the large black cartridge, the price falls to $85.97 but the majority of the color cartridges would not be the XL size reducing the number of pages they can print. Purchasing them through a retailer like Amazon will save a little bit of money, but not a huge amount.
The nice part is that since each of the colors is a separate cartridge, you only have to replace those colors that actually run out. Thus, if you print a lot of one color, you can buy it alone and wait on replacing the others. Other systems that combine the cyan, magenta and yellow in a single cartridge require replacement if any one color in it runs out.
Pricing and Verdict
Overall, I’m pleased with the output especially with the photo printouts which is the primary reason most people would go for such a printer. I still think that if you are using your printer less for printing photos and more for printing out web pages or traditional documents, you would be better served by a color or black and white laser printer as the costs are much more manageable on the toner than it is for ink. You then can just just use a photo service for those times that you need that type of output.
While I like the output, the design I think needs a lot of work. The awkward layout of the output door and the paper trays make it very difficult to use. Combine this with the fact that certain devices and programs have difficulty in letting you select what type paper and thus which tray to use makes it very annoying. At times, you may be better off printing straight from the printer via a memory card than trying to use applications.
So, if you want to print or copy photos and don’t mind the quirks of the layout or will be using it frequently without a computer, the Canon is a good printer.

Pingback: Can 3rd Party Ink Cartridges Work As Well As Name Brand Ones? - Tech for Anyone